This article will show you how to adjust wheel positions on inline skates, whether they have 3 or 4 wheels. The front and back wheels usually degrade more quickly than the central ones, and the pattern of wear varies between the right and left skates. By rearranging the wheels according to the right pattern, you can improve performance and lengthen the wheels' lifespan.
The strategies detailed here serve as suggestions. They are straightforward yet effective for maintaining flat wheel settings and prolonging wheel life. Numerous methods exist for wheel rotation on inline skates, and as you become more proficient, you may develop your own preferences and techniques.
Overview
Wheel Adjustment for 4-Wheel Inline skates
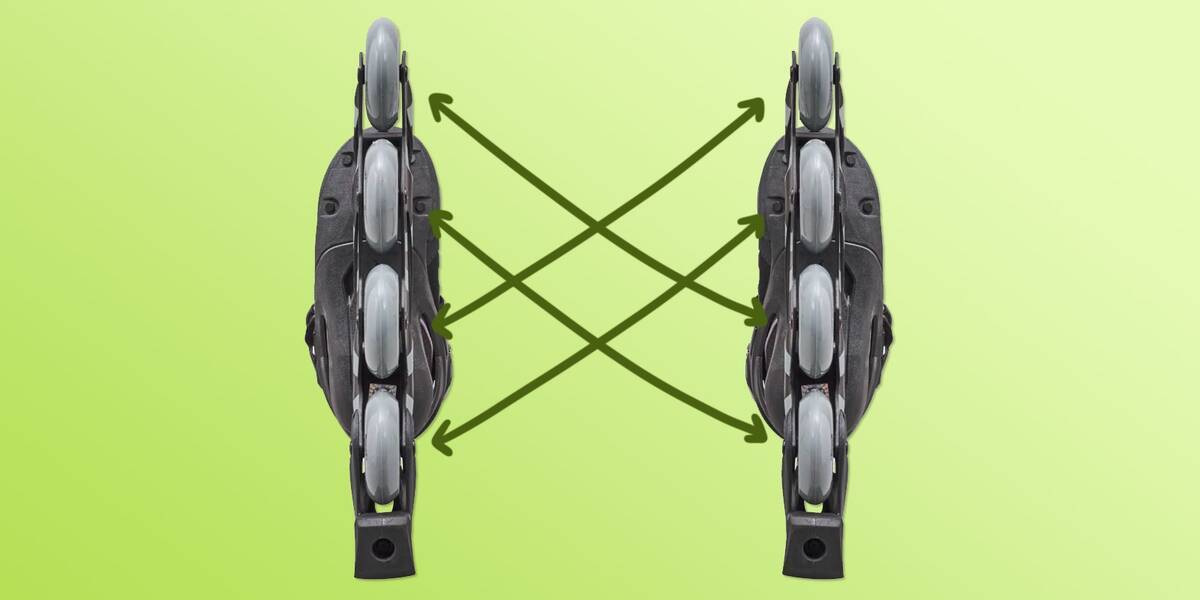
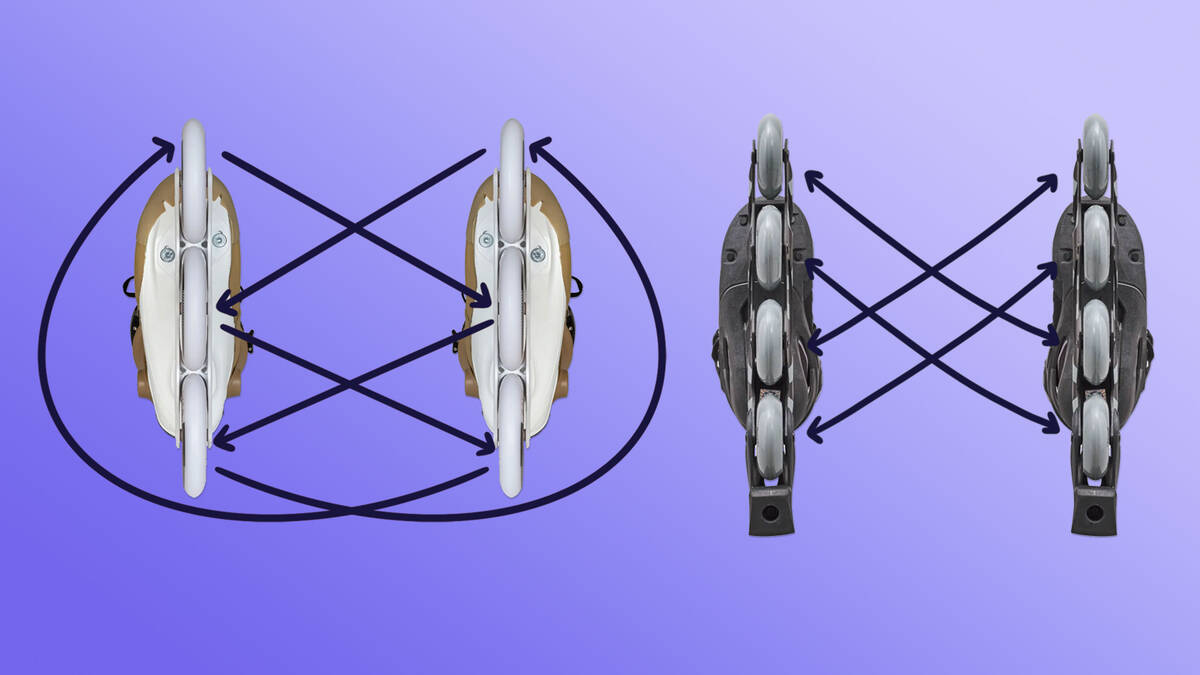
One common technique for adjusting wheels on 4-wheeled inline skates is to swap the two back wheels of one skate with the two front wheels of the opposite skate, following the example in the image above.
You may use a little piece of masking tape for each wheel to mark its original location, preventing any mix-ups during the process.
Initial wheel arrangement:
| Left skate | Right skate |
| 1 Left | 1 Right |
| 2 Left | 2 Right |
| 3 Left | 3 Right |
| 4 Left | 4 Right |
Arrangement of wheels following adjustment:
| Left skate | Right skate |
| 3 Right | 3 Left |
| 4 Right | 4 Left |
| 1 Right | 1 Left |
| 2 Right | 2 Left |
- Note: Always flip each wheel. If the graphics were facing outward before, they should face inward after remounting.
Wheel Adjustment for 3-Wheel Inline skates
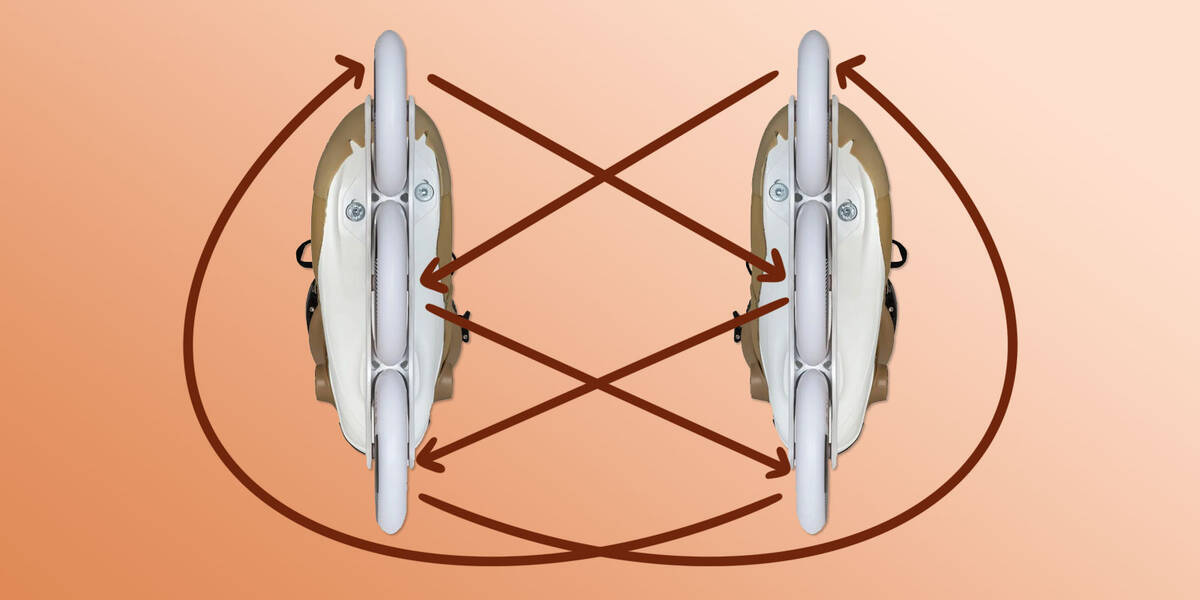
Shown in the image above is a useful method for adjusting wheel positions on 3-wheeled inline skates. It aims to ensure all six wheels wear evenly, thereby prolonging their service life.
Several techniques can be used to adjust the wheels on 3-wheeled skates. For those new to triskates, the adjustment patterns outlined below offer a solid starting point.
You may use a little piece of masking tape for each wheel to mark its original location, preventing any mix-ups during the process.
Initial wheel arrangement:
| Left skate | Right skate |
| 1 Left | 1 Right |
| 2 Left | 2 Right |
| 3 Left | 3 Right |
Arrangement of wheels following adjustment:
| Left skate | Right skate |
| 3 Right | 3 Left |
| 1 Right | 1 Left |
| 2 Right | 2 Left |
- Note: Always flip each wheel. If the graphics were facing outward before, they should face inward after remounting.
Required Tools for Adjusting Inline skate Wheels
A 4 mm Allen key or Torx tool is necessary to detach and reattach the wheels. Often, two such keys are required—one for each side of the wheel—to manage both the female and male ends of the wheel bolts during removal and reattachment.
Skate tools are particularly useful for adjusting wheel positions on inline skates, as they generally come equipped with all necessary components for assembling and disassembling your skates. Find one here:
Discover how to remove inline wheels with this guide:
How Regularly Should You Adjust Inline skate Wheels?
How often you adjust your wheels is influenced by how regularly you skate, the surfaces on which you skate, and your skating style.
You should consider adjusting the wheels when the wear begins to noticeably drift from the centre. Some skaters might need to adjust wheel positions after every session, while others might find it only necessary a few times each season.
Once you become accustomed to the process, it takes just five minutes to adjust your wheels.
If you're contemplating whether to replace your wheels or invest in new skates, consider this helpful guide: